Posts

Frame prep & painting

Image
This is the one part of the project I dreaded the most - painting the frame. After receiving rather outrageous quotes from local shops to sandblast the frame, I then resorted to using the soda blaster myself. When that yielded unsatisfactory results I turned to old-fashioned sanding by hand, accompanied by a palm sander for the top tube and other accessible spots. I also used a Dremel with various bits for some nooks & crannies.
Forks

Image
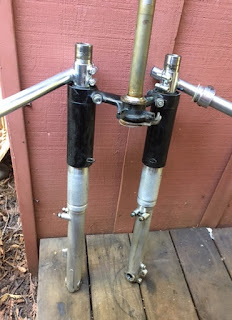
I took apart the forks to clean and polish. These forks have a stamp that indicates date of manufacture on the inside bottom leg. These were made September 1966: After cleaning and polishing, I also repainted the black dust sleeves in bright silver with black trim. After installing back on the frame they will be filled with fresh 20-weight fork oil.

Tachometer Mount

Image
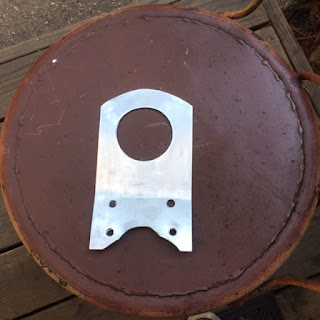
I made a mount for the Veglia Tachometer out of sheet aluminum. It's just a mockup of what I want to make out of thicker gauge at a later point. But for now, this should work.

New Tank

Image
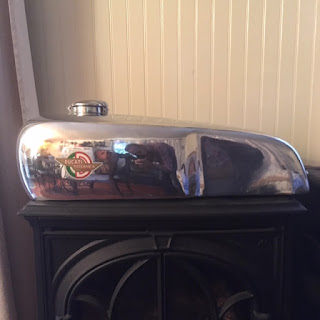
The tank that I will use for the bike finally arrived, after a two-month wait. It certainly looks great, but I was disappointed to find out that the bungs that were welded onto the bottom had male instead of female threads, and the opening was also much too large for the original OMG fuel petcocks I had planned to use: The decision was made to have a friend weld a piece of aluminum stock in the existing hole, then I would have to drill and tap the correct thread: At this stage I'll wait until the bike is further along in the assembly process, and if needed I will use gas-resistant thread seal to protect from leaks.

Fenders and Seat

Image
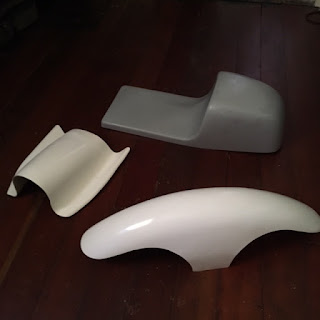
I sourced the fiberglass components for the bike which consist of the front and rear fenders as well as the seat cowl. The fenders came from Air-Tech Streamining in Vista, CA and the seat was ordered from Europlast in Gambettola, Italy. In attempting to be period correct, I planned on using nitrocellulose paint for these parts. I ordered two different shades of red; Dakota and Fiesta red. Both were used by Ford in the 1960's and coincidentally were also used by Fender Guitars at the same time. I sprayed both colors to see how they would look in person, since color samples shown on the vendor's website couldn't be trusted. On the left is Fiesta Red and the Right is Dakota Red: In my opinion Fiesta Red was too orange and Dakota Red had too much purple. After  searching around for a bit, I finally ended up going with contemporary Ferrari Red. I'm pretty happy with the result: Next on the list is to make a frame for the seat cowl pictured above. I plan o...

Soda Blasting

Image
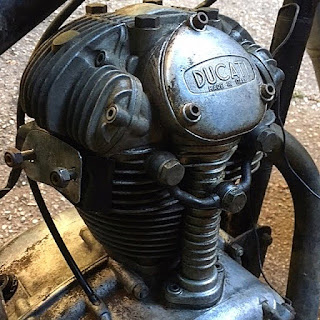
After numerous false-starts, I was finally able to remove and soda blast the engine. Below are some before and after photos: I used the 15lb 'Central Pneumatic' soda blaster. A few things about this product: first, it needs a lot of air - don't bother trying to use this unless your air compressor can put out at least 9 CFM. Second, you will need a separate, high-quality water remover in-line with your air supply. The smallest amount of moisture will clog the machine and you'll have to take it all apart, de-clog, etc...not worth it. Finally, as with all tools be sure to have proper PPE - in this case that means a proper respirator, goggles and clothing that you either don't care about or can dedicate to dirty work.

Wheels & Tires

Image
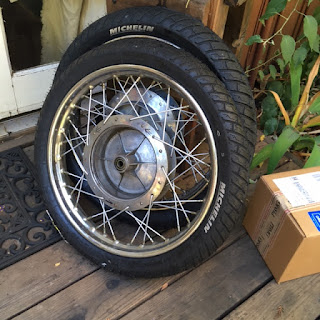
I got some new tires mounted on the original wheels, after soda blasting and polishing them as best I could. It would have been nice to get new rims or re-chrome the existing ones since the chrome is flaking away at certain points, but I'm trying to keep costs down so it isn't a priority at this point. With the hubs removed I inspected the brake shoes and the appeared to still have some life in them, so for now I will not replace them. What you see is after approximately one hour of polishing and removing small scratches.