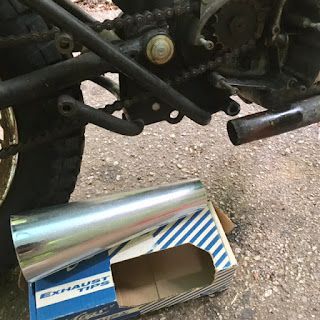
Posts

Showing posts from September, 2017

New Tank

Image
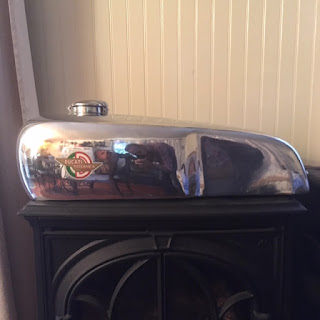
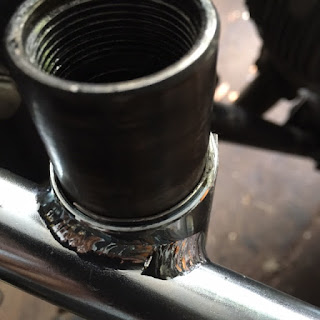
The tank that I will use for the bike finally arrived, after a two-month wait. It certainly looks great, but I was disappointed to find out that the bungs that were welded onto the bottom had male instead of female threads, and the opening was also much too large for the original OMG fuel petcocks I had planned to use: The decision was made to have a friend weld a piece of aluminum stock in the existing hole, then I would have to drill and tap the correct thread: At this stage I'll wait until the bike is further along in the assembly process, and if needed I will use gas-resistant thread seal to protect from leaks.

Fenders and Seat

Image
I sourced the fiberglass components for the bike which consist of the front and rear fenders as well as the seat cowl. The fenders came from Air-Tech Streamining in Vista, CA and the seat was ordered from Europlast in Gambettola, Italy. In attempting to be period correct, I planned on using nitrocellulose paint for these parts. I ordered two different shades of red; Dakota and Fiesta red. Both were used by Ford in the 1960's and coincidentally were also used by Fender Guitars at the same time. I sprayed both colors to see how they would look in person, since color samples shown on the vendor's website couldn't be trusted. On the left is Fiesta Red and the Right is Dakota Red: In my opinion Fiesta Red was too orange and Dakota Red had too much purple. After  searching around for a bit, I finally ended up going with contemporary Ferrari Red. I'm pretty happy with the result: Next on the list is to make a frame for the seat cowl pictured above. I plan o

Soda Blasting

Image
After numerous false-starts, I was finally able to remove and soda blast the engine. Below are some before and after photos: I used the 15lb 'Central Pneumatic' soda blaster. A few things about this product: first, it needs a lot of air - don't bother trying to use this unless your air compressor can put out at least 9 CFM. Second, you will need a separate, high-quality water remover in-line with your air supply. The smallest amount of moisture will clog the machine and you'll have to take it all apart, de-clog, etc...not worth it. Finally, as with all tools be sure to have proper PPE - in this case that means a proper respirator, goggles and clothing that you either don't care about or can dedicate to dirty work.

Wheels & Tires

Image
I got some new tires mounted on the original wheels, after soda blasting and polishing them as best I could. It would have been nice to get new rims or re-chrome the existing ones since the chrome is flaking away at certain points, but I'm trying to keep costs down so it isn't a priority at this point. With the hubs removed I inspected the brake shoes and the appeared to still have some life in them, so for now I will not replace them. What you see is after approximately one hour of polishing and removing small scratches.

Clip-Ons

Image
I wanted to install clip-on handlebars on the bike. I chose NOS Menani bars from Italy, with a 15-degree angle. The were supposedly for 31.5mm fork tubes, however even when fully tightened there was a bit too much play. I eventually decided to make a couple shims from 2mm stainless steel strips: These gave just enough extra space for a proper mount. Next task will be to install a pair of headlight/ fork ears, like these vintage Ceriani items: For now, the clip-ons definitely look the part.

Exhaust System

Image
I decided to fabricate my own open-megaphone-style muffler for the bike. I utilized the header pipe that came with the bike, and simply cleaned all the rust off of it, then sprayed with high-temp flat black coating. I got an open cone tailpipe for cheap, however both the inlet and outlet were bigger than I needed: So, I had a friend weld a connection that would fit nice and snug on the header pipe: At the same time, I went ahead and used a saw to cut a bit off the exhaust tip. I wanted to end up with an opening of about 3.5 inches at the most. One of the nice things about having a second bike (especially one that already runs) is that you can trial parts much easier. So I installed the 'new' exhaust system on bike #1 to confirm fit and finish, and of course to hear what it sounds like. I'm pretty happy with the way it looks (and sounds)...it's pretty much exactly what I was going for. This style of muffler reminds me of the original racing bikes in