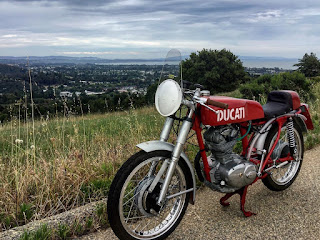
After popping off the valve covers and checking clearances, I installed new gaskets. Then we put the motor back in the bike. At this point there will be lots work done for attachments for cables, wires and other fittings.
Back when I had the engine on the workbench, I installed the first portion of the Powerdyanmo Ignition system. I had previously installed this system on my other bike and have enjoyed excellent results, so I repeated the process here with photos: After removing the side cover the clutch and factory alternator are visible. I removed the clutch plates & basket along with the alternator in order to install the Powerdyamo magneto: After reinstalling the clutch the next step was to install the control box and ignition advance unit. As with the other bike, I chose to mount these together below the seat cowl: At this point, it's simply plug and play - no more adjusting points or worrying about having a fully-charged battery. The Powerdyamo also 'upgrades' the ignition system from 6-volt to 12-volt and provides a more reliable spark as well as better lighting. I will be taking my time with the wiring as to make sure everything is a clean installation.
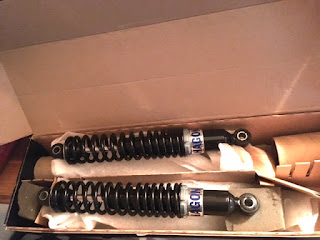
Got a killer deal on a pair of new Hagon shocks, however I think I'm going to put these on my bike that is currently running, and the shocks on that bike will go on the project bike.


Comments
Post a Comment